最近のPCアプリの世界では、従来EXEやDMGというアプリケーションとして配布されていたものが、どんどんとWEBアプリへ移行しています。
当然ですが、背景にはHTML5やjQueryの恩恵など、ブラウザ上でリッチなコンテンツ提供ができるようになったという技術的背景がありますが、
もう一方で、企業・学校などの法人での導入のしやすさも普及の大きな背景です。
企業や学校など法人で管理しているPCでは、「アプリ」は自由に利用できないものです。
一方で、「WEBアプリ」はブラウザにアクセスできれば「自由に使えるもの」ですのでこの差が非常に大きいと思われます。
後は、企業がデータをクラウドに保存することへの嫌悪感が無くなれば、一時期はやったシンクライアントPC化というものが一気に進むと考えられます。
SurfaceViewの一連の関数は次の順番で呼ばれるようです。
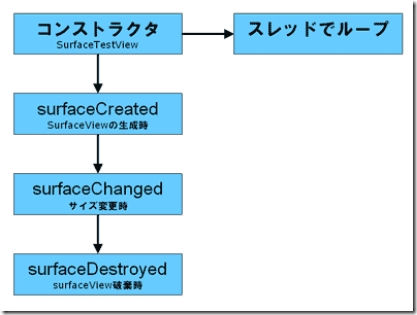
そのため、SurfaceChangedは初回も呼ばれるけど、
SurfaceChangedで取得したWidthやHeightは、SurfaceCreatedでは使えない模様。
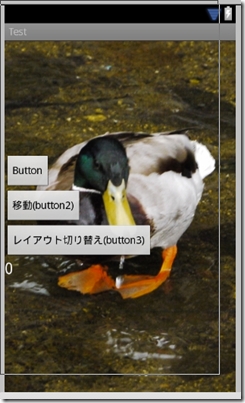
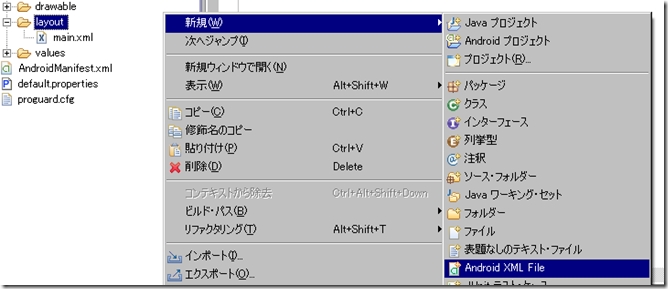
ページ切り替え方法2つ目は レイアウト切り替えです。
非常に簡単に切り替えが可能です
メニューのページめくり程度であれば
この方法がいいと思います。
ボタンが押されたときに
setContentView(R.layout.test2);
をするだけでOKです!
1つ目のレイアウトをmain.xml
2つ目のレイアウトをtest2.xmlとします。
1つ目のレイアウトにあるレイアウト切り替え用のボタンをbutton3とします。
0008-0001
//---------------------------
//ボタンがクリックされたら呼ばれる関数
//---------------------------
public void onClick(View v) {
	// TODO 自動生成されたメソッド・スタブ

	if(v==button1){        //ボタン1の場合
		if(clickcount%2==0){
			text1.setText("gaa");        //text1をがぁ~に
		}else{
			text1.setText(" ");            //text1を消す
		}
		clickcount++;
	}else if(v==button2){
		Intent intent = new Intent(this, TestActivity2.class);
		startActivityForResult(intent, 0);
	}else if(v==button3){
		setContentView(R.layout.test2);
	}

}
アプリ内で違う画面(ページ)に移動する簡単な方法が2つあります。
まずは1つ目の違うActivityに移動する方法からご紹介します。
異なるActivityへの移動はintentという形式で連携しながら遷移します。
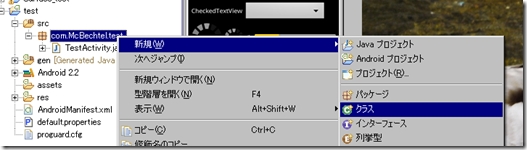
名前: 任意の名前
スーパークラス: android.app.Activity
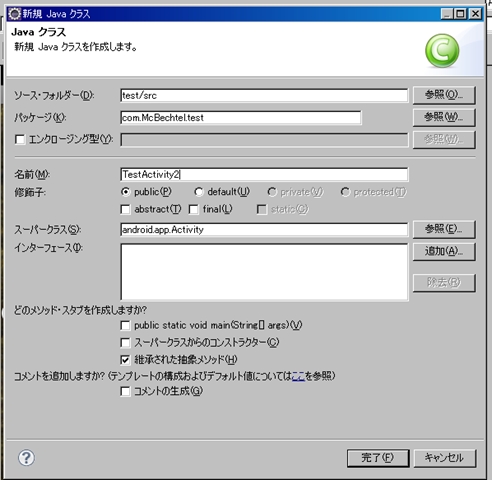
今回はこんな感じにしました
test2.xml
<?xml version="1.0" encoding="utf-8"?>
<LinearLayout xmlns:android="http://schemas.android.com/apk/res/android" android:orientation="vertical" android:layout_width="match_parent" android:layout_height="match_parent">

	<TextView android:layout_height="wrap_content" android:text="ページ移動しました" android:textAppearance="?android:attr/textAppearanceLarge" android:id="@+id/textView1" android:layout_width="wrap_content">
	</TextView>

</LinearLayout>
package com.McBechtel.test;

import android.app.Activity;
import android.os.Bundle;

public class TestActivity2 extends Activity {

@Override
public void onCreate(Bundle savedInstanceState) {
super.onCreate(savedInstanceState);
setContentView(R.layout.test2);
}
}
setContentView(R.layout.test2);
の部分ですね。
マニフェストと聞くと、最近の政治を思い浮かべてしまいますが
マニフェストファイルとはActivityを管理するファイルです。
全Activityリストや、最初に起動するActivityは何?などの情報が記載されています。
Activityを追加した場合はこのマニフェストファイルに記載が必要です。
<?xml version="1.0" encoding="utf-8"?>
<manifest xmlns:android="http://schemas.android.com/apk/res/android" package="com.McBechtel.test" android:versionCode="1" android:versionName="1.0">

    <uses-sdk android:minSdkVersion="8" />

    <application android:icon="@drawable/icon" android:label="@string/app_name">
        <activity android:name=".TestActivity" android:label="@string/app_name">
            <intent-filter>
                <action android:name="android.intent.action.MAIN" />
                <category android:name="android.intent.category.LAUNCHER" />
            </intent-filter>
        </activity>

        <activity android:name=".TestActivity2" android:label="@string/app_name">
        </activity>

    </application>
</manifest>
<activity android:name=".TestActivity2" android:label="@string/app_name">
</activity>
が追加した部分です。
1個目のタグ内の部分が
アプリ起動時に呼ばれるActivityに関する記述です。
<Button android:text="移動" android:id="@+id/button2" android:layout_width="wrap_content" android:layout_height="wrap_content">
</Button>
ボタンクリック時の動作部分に追加
Intent intent = new Intent(this, TestActivity2.class);
startActivityForResult(intent, 0);
これが移動させるためのコードになります。 これをボタンを押したら呼ばれるonClick内に記載すればOKです!
public class TestActivity extends Activity implements OnClickListener {
    /** Called when the activity is first created. */

    private Button button1,button2;         //ボタン用変数(1)
    private TextView text1;            //テキスト用変数(2)
    private int clickcount=0;        //ガァ~表示用 カウンター

    @Override
    public void onCreate(Bundle savedInstanceState) {
        super.onCreate(savedInstanceState);
        setContentView(R.layout.main);

        //(1)で作成した変数と、XMLで作ったボタン(button1)を紐付け
        button1=(Button)findViewById(R.id.button1);
        //button1のクリックを通知する機能を実装
        button1.setOnClickListener(this);

        //(1)で作成した変数と、XMLで作ったボタン(button1)を紐付け
        button2=(Button)findViewById(R.id.button2);
        //button1のクリックを通知する機能を実装
        button2.setOnClickListener(this);

        //(2)で作成した変数と、XMLで作ったテキストを紐付け
        text1  =(TextView)findViewById(R.id.textView1);

    }

    //---------------------------
    //ボタンがクリックされたら呼ばれる関数
    //---------------------------
    public void onClick(View v) {
        // TODO 自動生成されたメソッド・スタブ

        if(v==button1){        //ボタン1の場合
        if(clickcount%2==0){
                text1.setText("gaa");        //text1をがぁ~に
        }else{
                text1.setText(" ");            //text1を消す
        }
        clickcount++;
        }else if(v==button2){
            Intent intent = new Intent(this, TestActivity2.class);
            startActivityForResult(intent, 0);
        }

    }

}
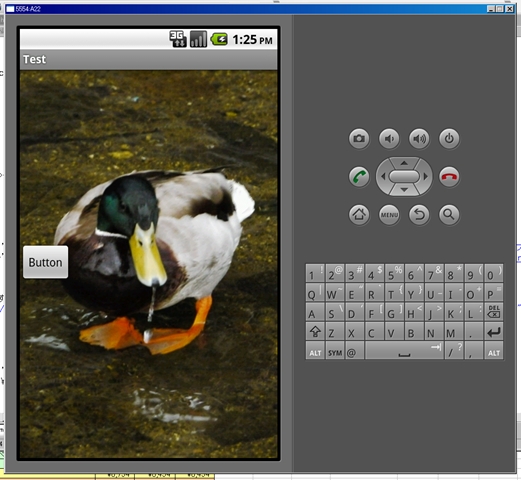
main.xmlで配置したボタンに動作をつけます
今回はボタンを押したら「ガァ~」と文字が表示されるようにします。
また、もう一回ボタンをおしたら「ガァ~」が消えるようにします。
 |
←クリック→ | 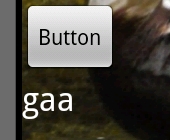 |
<?xml version="1.0" encoding="utf-8"?>
<LinearLayout xmlns:android="http://schemas.android.com/apk/res/android" android:orientation="vertical" android:layout_width="fill_parent" android:layout_height="fill_parent" android:background="@drawable/background" android:gravity="center_vertical" >
		<Button android:text="Button" android:id="@+id/button1" android:layout_width="wrap_content" android:layout_height="wrap_content">
		</Button>

		<TextView android:id="@+id/textView1" android:layout_height="wrap_content" android:text="0" android:layout_width="wrap_content" android:textAppearance="?android:attr/textAppearanceLarge">
		</TextView>
</LinearLayout>
ボタン:名前(button1)と、
テキストエリア:名前(textView1)を設置しています
public class TestActivity extends Activity implements OnClickListener {
	/** Called when the activity is first created. */

	private Button button1;         //ボタン用変数(1)
	private TextView text1;         //テキスト用変数(2)
	private int clickcount=0;  //ガァ~表示用 カウンター

	@Override
	public void onCreate(Bundle savedInstanceState) {
		super.onCreate(savedInstanceState);
		setContentView(R.layout.main);

		//(1)で作成した変数と、XMLで作ったボタン(button1)を紐付け
		button1=(Button)findViewById(R.id.button1);

		//(2)で作成した変数と、XMLで作ったテキストを紐付け
		text1  =(TextView)findViewById(R.id.textView1);

		//button1のクリックを通知する機能を実装
		button1.setOnClickListener(this);
	}

	//---------------------------
	//ボタンがクリックされたら呼ばれる関数
	//---------------------------
	public void onClick(View v) {
		// TODO 自動生成されたメソッド・スタブ
		if(clickcount%2==0){
			text1.setText("gaa");  //text1をがぁ~に
		}else{
			text1.setText(" ");         //text1を消す
		}
		clickcount++;
	}
}
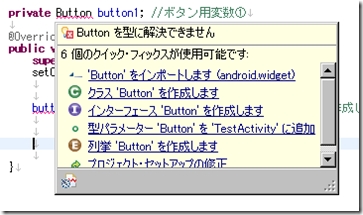
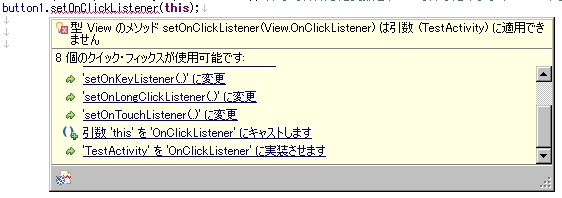
大体赤の波線が出たときはeclipsが助けてくれますので、
メニューから必要な情報をインポートしていけばOKです
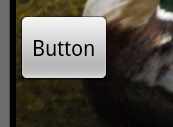
今回はボタンを作ってみます。
「ボタン」や「スイッチ」などは【Widget】と呼ばれます。
※検索の際はウィジェットのキーワードで調べると引っかかりやすいでしょう。
今回は標準パーツを使ってボタンを作ります。
<?xml version="1.0" encoding="utf-8"?>
<LinearLayout xmlns:android="http://schemas.android.com/apk/res/android"
    android:orientation="vertical"
    android:layout_width="fill_parent"
    android:layout_height="fill_parent"
    android:background="@drawable/background"
    android:gravity="center_vertical"
    >
    <Button
        android:text="Button"
        android:id="@+id/button1"
        android:layout_width="wrap_content"
        android:layout_height="wrap_content">
    </Button>

</LinearLayout>
こんな感じでmain.xmlを編集します。
Graphical Layoutタブを選んでForm Widgetからボタンをドラッグドロップして配置してもOKですが、
そのうち微調整などでXML側で編集せざるをえないとおもいますので、覚えておいたほうが良いと思います。
0005-0001
HTMLでいうvalign=center的なもの
LinerLayoutで
android:orientation="vertical"
android:layout_height="fill_parent"
で縦いっぱいにエリアが取られます。 (fill_parentは、100% をいう感じ)
そこで
android:gravity="center_vertical"
でOKです。
最終的にこんな感じ
<LinearLayout
	android:orientation="horizontal"
	android:layout_width="fill_parent"
	android:layout_height="wrap_content"
	android:gravity="center_vertical"
>
	<TextView
	android:text="@string/nam_str"
	android:layout_width="fill_parent"
	android:layout_height="wrap_content"
	/>
</LinearLayout>
ドラッグ-アンド-ドロップでOK

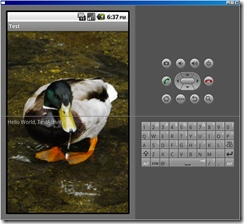
background.png
<span class="tag"><LinearLayout</span> <span class="atn">xmlns:android</span><span class="pun">=</span><span class="atv">"http://schemas.android.com/apk/res/android"</span> <span class="atn">android:orientation</span><span class="pun">=</span><span class="atv">"vertical"</span> <span class="atn">android:layout_width</span><span class="pun">=</span><span class="atv">"fill_parent"</span> <span class="atn">android:layout_height</span><span class="pun">=</span><span class="atv">"fill_parent"</span> <span class="atn">android:background</span><span class="pun">=</span><span class="atv">"@drawable/background"</span> <span class="atn">android:gravity</span><span class="pun">=</span><span class="atv">"center_vertical"</span> <span class="tag">></span> <span class="tag"><TextView</span> <span class="atn">android:layout_width</span><span class="pun">=</span><span class="atv">"fill_parent"</span> <span class="atn">android:layout_height</span><span class="pun">=</span><span class="atv">"wrap_content"</span> <span class="atn">android:text</span><span class="pun">=</span><span class="atv">"@string/hello"</span> <span class="tag">/></span> <span class="tag"></LinearLayout></span></pre> <pre>こんな感じで2行追加しました
画像を指定
android:background="@drawable/background"センタリング
android:gravity="center_vertical"表示がこちら
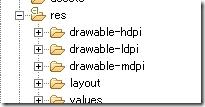
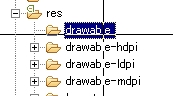
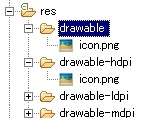
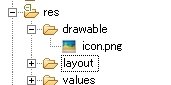
drawableフォルダは使用する画像データが入るフォルダです。
eclipseの初期状態で現れるhdpi / ldpi / mdpi のどのフォルダの画像が使用されるかは
端末の解像度で自動的に決定されるます。
全端末で一緒の画像でよければ 3つのフォルダを削除してdrawableフォルダを1個作ればOK です。
本当は drawable-normal-long-hdpi と3つのオプションを指定できます。
1個目: small / normal / large / xlarge
2個目: long / notlong
3個目:hdpi / ldpi / mdpi
こちらのサイトで計算表がありました
http://tomokey.blogspot.com/2011/06/androidsmall-normal-large-xlarge.html